Practical rendering advice
What to check when old render comes off
Stripping old render shows the wall as it really is: sound or eroded stone, cement-filled joints, patched brick and old openings. The next coat will hide all of it again, so this is the moment to look and decide whether to repoint, re-render in lime or use a modern system.

On this page
What to look at once the render is off
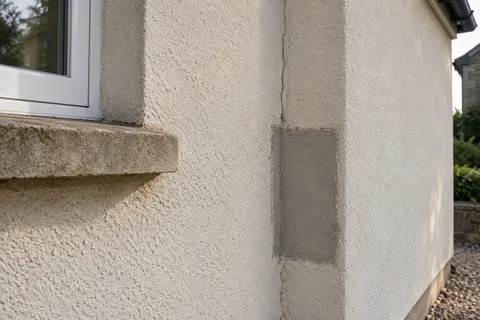
Stripping render shows the wall as it really is, and the next coat will hide it again, so this is the moment to look. Check the faces of stones or bricks for decay, hacking damage and old cement. Check the joints: soft and sound, cement-filled or open. Look for straight joints and odd patches that mark filled openings or a previous repair. Check lintels and sills over and under windows, and find the damp-proof course line at the base. Note anywhere the wall is wet and why.
For pebbledash removal, this matters most, because the quote was written before anyone could see the masonry. A previous repair may turn out larger than its outline suggested, or the stone may be sound enough to leave bare. Someone has to decide, at this point, whether the plan still fits the wall now exposed.


Removal and preparation are different stages
Getting an old coating off does not automatically leave a surface ready for new render. Weber's replacement guidance distinguishes removal from the cleaning and preparation required afterwards. It also notes the risk of damage to the underlying material during removal. A quotation should therefore make clear what condition the contractor expects to achieve before the replacement system begins.
A stripped wall is rarely ready to render straight away. Loose mortar is raked out, dust brushed off, remaining fragments of old render taken back to a clean edge, cracked bricks or stones replaced and hollows filled. A wet wall is given time to dry.
Where a lime-based repair is planned next to old render that is staying, the old render is cut back to a sound, square edge before the new work starts so the two meet cleanly. Lime is not applied over remnants of cement render, which would stop the wall drying through its face.
Each elevation can be different. A sheltered rear wall may come off cleanly and be sound behind, while the weather side is cement-pointed and decayed, so check each wall as it is exposed.
| Stage | Decision required |
|---|---|
| Trial complete | Confirm or revise the removal method. |
| Background exposed | Assess condition and additional repair needs. |
| Preparation finished | Check readiness for the specified system. |
| Before covering a detail | Record relevant interfaces and approvals. |
Starting with a trial patch
Before stripping a whole elevation, a small area is taken off as a trial. SPAB advises hand removal, a small test first, and no prising away of large pieces that could rip off the soft wall face. The trial shows whether the render releases cleanly, what is behind it and whether removal is doing more harm than good.
Choose the trial location for what it can tell you. A patch next to a window shows the reveal and lintel; one at the base shows the damp-proof course; a patch mid-wall shows the general condition. An easy-to-reach corner may be convenient without representing the rest.
Do not open the wall yourself to speed up a quote. The method and access are matters for whoever is doing the work.
What the exposed wall tells you to do next
Sound stone that was traditionally bare can often stay bare. Bradford Council’s stone guide describes the repair: rake out defective joints by hand to 25 to 40 mm, repoint in six parts sand to one of cement and one of lime, flush or slightly recessed, and replace only stones that are deeply eroded or fractured, from the same or a similar local source. Paint or render residue left on the stone needs specialist cleaning, which the council warns can cause irreversible damage if done wrongly.
A wall that was built to be rendered, such as an Arts and Crafts upper storey or rough common brick, is re-rendered. On older stone, the council’s render guide recommends soft lime-based render in three coats. On later brick and block, a modern system is used, with the background preparation matched to what was found.
A wall that is wet behind the old render is left to dry and the source of water fixed before any new coat goes on.
For example, take a hypothetical Bradford end terrace stripped of a later pebbledash. The front stone proves sound apart from cement-filled joints, so it is repointed and left bare to match the rest of the terrace. The gable has hacked faces and brick patches, so it is rendered in lime. The rear outrigger is common brick and takes a modern render. Three walls, three outcomes, decided only once the dash was off.
What to check before the new render goes on
Before the first new coat, look again: joints repointed and the mortar firm, damaged stones or bricks replaced, lintels sound, holes from old fixings filled, and the background damp but not wet if lime is going on. Beads should be fixed straight, with the bell-cast bead set a little above the DPC.
Where the system uses mesh, it goes into the base coat around openings and across changes of background, fully bedded with no wrinkles before the next coat.
Photograph the prepared wall. Once it is rendered, those photographs are the only record of what was repaired and where the backgrounds change.
Protecting a stripped wall
A wall left stripped is exposed to rain it may not have felt for decades. If there is a gap between stripping and rendering, the wall is sheeted, the scaffold kept up and the gutters and downpipes kept working so water is not poured down bare masonry. In winter, frost on a wet stripped wall can damage soft stone and fresh mortar, so repointing and rendering wait for suitable weather.
If the exposed wall raises a question, such as an unexpected crack or a decayed lintel, work stops at that point until it is answered, and the answer is recorded with photographs.
After the new render
When the render is finished, check that it includes the returns and small panels, that the edges and beads are clean, that stone left bare is free of splashes and that sills and drips work. Keep the photographs of the stripped wall with the product details.
The Bradford home page links to the removal, repair and lime pages if the exposed wall changes the work needed.
See housing and planning information for Bradford and nearby places, including the source and geography behind each figure.